27 July 2012

Aveeno: Daily Moisturizing Lotion review

Aveeno? Avee-yes! Meet my new bestfriend. He's sheer, creamy and oh-so effective.
I'll be honest, my skin hasn't been so great these past days. It's been dry from the heat, and thanks to the vast amounts of BP I've been slathering on (See the Daniel Kern Regimen) I've had a serious case of the flakies(*). I went out one day in pursuit of a soothing moisturizer to calm everything down: enter Aveeno. This moisturizer doesn't actually say to use it on the face, but thanks to all the great reviews on MakeupAlley I felt comfortable enough to do so.

The moisturizer itself contains oatmeal extract, a proven calming agent which soothes the skin. It's fragrance and paraben free (Which is nice to see in a drugstore product), although it does contain alcohol which is a little annoying. The product itself is quite sheer, although it does take a good ten minutes to absorb into your skin so bare that in mind if you plan to apply foundation on top. It's gentle, hasn't caused/aggravated my spots and the best bit really, is that it's very cheap. A bottle of 300ml costs only £5.10 from Boots. I was torn between this and the Shiseido 'Moisturizing Emulsion' ( £33.50), and I'm glad I chose this. While it doesn't get rid of my dry skin completely, I find it's most useful for calming it. The burning and itching associated with BP *Benzoyl Peroxide* goes away almost immediately after I put this on, and the flakes of dry skin *eww* lump up making them easy to extract. 


This is after I rubbed it in, after leaving it a few moments it will completely dissapear
(*) If you're on the Regimen or your skin is feeling dry and tight from the use of skincare products, try adding a few drops of Jojoba Oil to your moisturizer. Very effective!!

OX

26 July 2012

Lush Fresh Face mask: Catastrophe Cosmetic Review

So this is my second pot of Lush's Catastrophe Cosmetic face mask (£5.95-ouch!) and I wanted to share it with you. It's one of the most beneficial masks that I have ever used in my life, it seriously does wonders! It gets rid of all my spots after two uses and freshens me up leaving a nice tingly feeling. At first I was recommended this product by one of the super friendly Lush staff and I doubted the face mask to be honest with you! The look just wasn't very appealing but I decided to go with what the lady said and bought it; then came out a very happy Denny!


I had recently broken out on my forehead (gross!) and I hardly had any obvious spots on my face before so I knew it was time for a bit of CATASTROPHE COSMETIC! It works amazing on my skin and even though they have a mask for teenage skins (CUPCAKE), this one is much much better! 
I admit that the smell of cupcake is heavenly but when a crisis comes you just gotta do what you gotta do! 


After the first use of this face mask I saw a dramatic difference in my skin and I can't imagine what I would do if Lush didn't make this! My face was brighter, my spots were reduced (ALOT!), my skin was hydrated, and evened out my skin tone. This is the perfect mask to whack on before you go on Holiday! It smells nice and refreshing too.
It doesn't look the best, but who cares about the appearance when your going to wash it off anyway!


What I love about these Fresh Face masks is that when you bring back 5 empty fresh face mask tubs, you get one free!


XO

Doughnuts and Latte!

So I come back home from a hard days worth of shopping and come back with two boxes of Krispy Kreme doughnuts... should I feel guilty? Nah! A box full of delicious assorted doughnuts and a box full of the original glazed doughnuts, I couldn't resist! Besides they were much cheaper if you bought two together (offer). Which ones are your favourite?? Mine has to be the original glazed, cinnamon apple and millionaires something!

What they looked like before my mum dropped then face down on the floor...
FAIL


Having a hot drink on the first sunny Summers day of England?!  My parents are crazy! I had the chocolate iced mocha, LOVELY JUBBLY stuff!


Too right!
XO

25 July 2012

London calling!

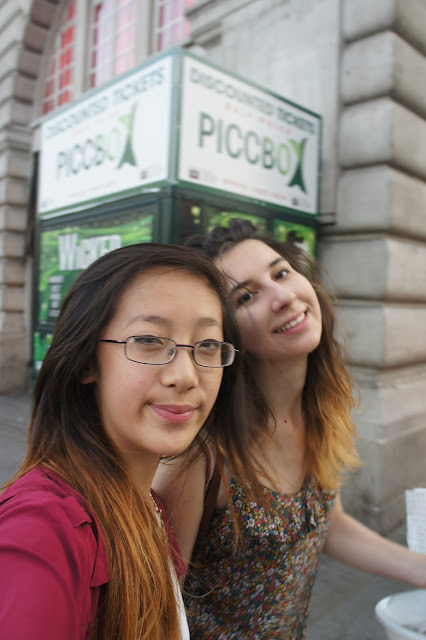
It was time for Urban Bible's first trip to the capital! Yep, Monday Denny, Alysha (a friend of ours) and I hit the streets of London for some quality tourist time and a little shopping. It was really hot that day (30 degrees!!) and the city was more packed than usual because of the upcoming Olympics. But even with the sweaty tubes, overcrowded shops and lost tourists- we still had a lovely time. Plus, we got a chance to sneakily preview our blog in the Apple Shop!!

Food tastes better on vespas

Dara looking fly outside her favourite fast food Asian shop!


Our blog in the Apple store

Dinner with Denny


Tourist shot!


Dara's looking a little too excited here...


OX

DIY Ombre hair at Home

So me and Dara decided one day to Ombre our hair to add a bit of oomph to our hair! Before hand we had watched plenty of YouTube videos and took advice from other people on the internet so we felt ready to do it ourselves and save a LOT of money by not doing to the hairdressers and get it professionally done!  I mean some strands of hair weren't smooth and looked like kinks! (thankfully you can't see it in the pictures). Although, I could imagine it being much worse and it is easy to touch up!! Here's a snippet of Dara's Ombre hair:


Before:
Here with black/very dark brown hair!
 I will miss my natural hair!


After:


 I can assure you It wont look as ginger as I will be using a hair toning shampoo that counteracts with the brassiness and ginger tones, this will take a couple of weeks


Here is the result of my hair after applying more bleach to the very ends of my hair to get the ombre look!

A gradual gradient of colour from dark to light, creating a more noticeable or a weaker ombre depending on how concentrated the dye is how how much of it you put in your hair.


Excuse the face and angle of the photo, but the blonde tips are highlighted here :) 


Just before leaving the house to go shopping and have some family time. I have recorded a Summer Sale haul video with Dara which will soon be on our YouTube channel 'UrbanBible' as soon as I learn how to connect the camcorder to the laptop! (If anyone knows how to do this please let me know, it's fine I figured it out!)

I would recommend you buy a hair toner to remove any brassiness and ginger tones (not a great look!) but they are quite hard to get hold of! Unless you are a professional hair colourist...
So instead you could buy a tone correcting shampoo/conditioner. I have mine from John Frieda-Colour renew shampoo and you can find it in Boots and Tesco (cheaper). The bottle says it neutralises brassiness and is for colour treated blondes. It recommends you use it 3 time per weeks for best results too. I can't give my opinion on it as I have only used it two times!

So yeah make sure you read the instruction booklet your bleach kit comes with and be careful if you are safe and sound! Other than that, ombre hair is pretty low maintenance and easy to touch up! Just make sure you conditioner your hair with a rich hair mask before and after as bleach is very damaging to your hair and use as little heat as possible! 


How to get yourself ready for bleaching and protect it afterwards?
  1. Use protective serum before you bleach your hair to give your hair a protective shield.
  2. Before you bleach your hair get a trim! Cut off all your split ends to have a smoother and sleeker looking hair style and finish.
  3. Condition your hair after you have swashed your bleach out (leave in for as long as you want-the longer the better).
  4. Try to prevent washing your hair too much after you have washed the bleach out of your hair. You want the natural oils from your head to protect your hair- just remember to brush your hair to distribute the oils!
  5. Don't use any straighteners/curlers. This will damage your already damaged hair! Try any heat-free hair styles that can give you the same results
  6. Air dry your hair instead of blow drying it. (If you washed your hair in the evening/night and it takes a few hours to properly dry then loosely plait your hair to sleep in and wake up with nice loose waves!)
  7. Use shampoos and conditioners made fore coloured and damaged hair! These would be very beneficial, as your hair would have changed dramatically from bleaching.
  8. RESPECT YOUR HAIR.
Great hair conditioners I love to use:
These two leave in conditioners are great to use after you have already used conditioner in the shower and want some extra nourishment and protection! Plus, all Aussie products are 3 for £10 in Boots so treat yourself to a third product from their hair care range.


23 July 2012

Start of summer

This post is just a little follow up to my suitcase post from a few days ago! I went to Northern Italy for a long weekend (Muggia & Trieste) to spend some time with the family. The forecast had predicted bad weather, and while it did rain, it was mostly sunny so I was able to enjoy a few warm days. Anyway, I'll keep this post short...enjoy some snaps and check back for more!  


OX

22 July 2012

Acid Washing Denim Shorts!

So I was motivated by Dara's DIY Acid rinse denim tutorial on YouTube Click here to watch video and decided to acid rinse a pair of cheap shorts I bought from Primark that I don't ever wear! 
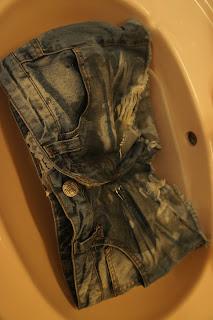
It was very simple to do, all you needed to do was cover the denim (well depending on how much you want to bleach) with some bleach (which you will probably have around the house) and leave it for 30mins! After checking up on your denim, once your happy with how it looks then you rinse it with water and then use washing up liquid to clean it up! Repeat and rinse until the water comes out clear.


I attempted to do a tie dye effect, instead of the whole thing being bleached, I guess it sort of worked. What do you think?


Bleach, Gloves and a container (preferably a larger one)
Bleaching 


The shorts originally had this really ugly lace detailing on the hem of the shorts so I took them off (as well as the fake diamonds!!) and ended up with some decent shorts.


Before and After pictures:


So yeah here's the front... 
...and the Back
And here's how they turned out:


I quite like how they turned out! 
The back


It actually took me an hour to bleach my shorts into the white colour I wanted. It depends on what colour denim (how dark the denim is) you started out with and how white you want your shorts! Have fun doing this to your shorts at home. 


XO